Blog, Cue Tips, Equipment, Snooker Chat
How to Make a Laminated Snooker Cue Tip

Aug
How to Make a Laminated Snooker Cue Tip
Well I’ve been changing snooker tips now for over 34 years and things have certainly changed since I used to pop down the local sports shop and buy a pack of ‘Blue Diamond’ tips. In those days, it was either purchase from the nice fella there or nothing and I’m sure that was the case for many villages and towns back in the day. Nowadays, it’s certainly a different story. There are many tip manufacturers scattered across the globe and with the progress of the internet, snooker tips are very easy to purchase and is normally the case, they are delivered right to your door.
For years snooker tips have been fairly constant in their design and haven’t received too much focus from the average club player but that is certainly not the case now. Laminated tips have boomed onto the scene and most snooker players are after every little advantage they can gain.
I was asked a little while back if I make my own tips, certainly a statement which I laughed at but it made me think how they are made. Now if you want to find a blueprint on how to make a laminated snooker cue tip then good luck with that as I certainly couldn’t find one.
So, for fun, I thought I would conduct a little experiment to see what I could create by using the most basic of items hoping that the finished, crude product would do the following things for me:
- Resemble a snooker tip when shaped and attached to a cue
- Play with a nice feel
- Grip the cue ball enough to screw it a few feet
Now this might not feel like much but I have virtually no knowledge of what to do so you might be interested to see how I got on. I hope you enjoy my journey over a couple of days; this was my first attempt.
So here goes…
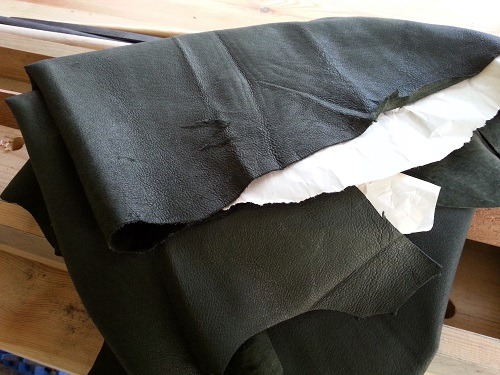
Purchase some leather
I have chosen to go with pig skin that is 0.6mm in thickness; I haven’t chosen anything expensive in fact this example is among the cheapest available so I can gauge what can be accomplished with very little money. I’m told that a high quality laminated snooker tip will require a high quality hide, without this you won’t have a hope of producing a quality tip, let’s find out.

Cutting the initial snooker tip layers
Now the first decision I was faced with was whether to just try and make a single laminated snooker tip or more. What I decided to do was cut the hide into 10cm squares so I could make a batch and then experiment from there. With the leather coming in at 0.6mm I felt that I would require around 11 layers (squares) to produce a decent height tip by sticking them together.
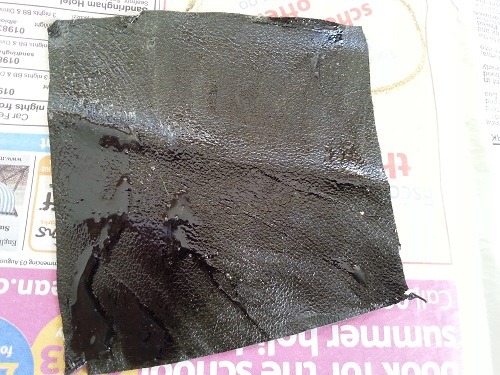
Preparing each layer ready for joining
I have only used a standard leather glue which you must spread evenly over the full surface area; try and remove those splodges you can see above! There are two sides to leather, one hairy (suede) and one not, only glue opposites together as we eventually want the ‘hairy’ side (the top) to grip the cue ball. I preferred to glue both sides of each layer so glue on glue so to speak prior to placing together.
Gluing the layers together
Once you are reasonably confident you have an even spread of the glue across both layers it is time to place them together. The art of gluing is to work the glue from the inside of the square toward the outside so you don’t leave glue puddles. Don’t forget, stick opposite sides of the layers together. As you can see, I have only stuck two together at the moment.
Compression plates
Now we will need to compress the leather squares so you need to decide what you are going to do this with. If I was doing this all the time I would certainly do it with two metal plates but to keep this cheap I have cut up some old laminate flooring which is nice and hard both sides. I know the laminates will be reasonably sound for our little experiment so good stuff!

Gluing and compressing the layers
Now here you have a choice. Do you glue the layers two at a time or do you glue them all together in one go? I decided to glue them in two’s first off as I wanted to see how flexible they were after the glue had dried. I did the vice up as tight as I could to express any glue excesses and left it like this overnight.

Final gluing compression
Once the sets of layers were removed from the first compression I glued the whole set together making sure that only opposite sides of the hide were joined. The sets of two layers were really flexible so I was hoping that once the eleven layers were joined that the overall flexibility would be minimal as you want to see the tip structure harden a little.

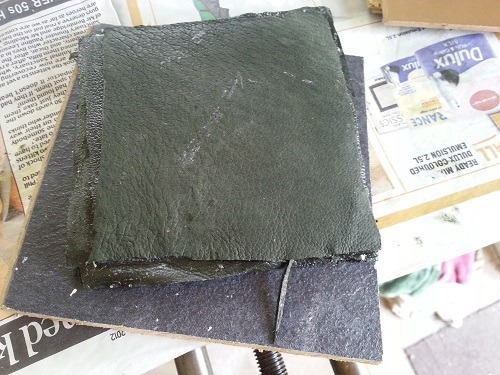
Laminated leather pad
After waiting again over night for the single layers to glue you can see here the overall pad that has been produced by sticking eleven layers together. The laminated pad itself is still surprisingly flexible and a lot more than I thought it would be at this stage. As you can see it here, I have trimmed the edges with a Stanley knife to clean it up a little.

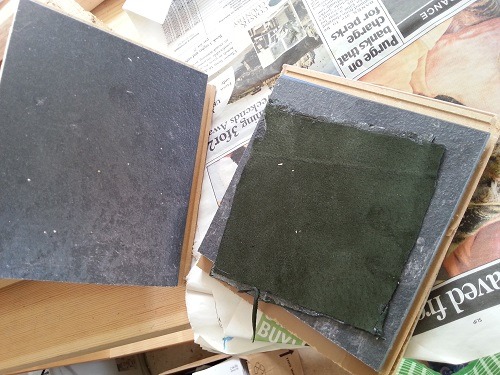
Cross section view of the laminate layers
Well now the laminated layers have been stuck together, compressed twice over night and trimmed, we can certainly get a decent view of the finished product as regards producing a laminated section ready for the next stage. Now as I said, I am still surprised as to the flexibility at this point. I would have thought the laminates fairly inflexible as you add more layers.

Punch or cut the leather?
At this point you can use a leather punch to cut out a nice 10mm circle out of the pad ready to make an average size tip, but, as I said, I want to keep the costs down so I did it the crude way and cut a 15mm strip off the pad and then cut them into squares. From here I was again shocked by the flexibility of the squares so need to somehow bind the core closer.
A further bonding agent
Well I wanted to compress the tips a little further and what’s the cheapest natural bonding agent we at home? I guess that’ll be full fat milk. The theory being that I would soak them over night and then further compress them. So I soaked them for a day and a half and the milk started to turn whilst watching the Olympics but luckily I’m not going to drink it!
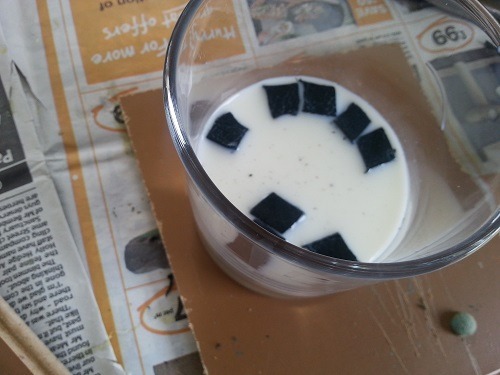
Soaked laminated snooker tips
Well I can tell you now that these don’t smell too good but I thought I’d give you a little peek before the next step. They are like a sponge at this stage, you can still see each layer and they are very, very flexible and don’t resemble a snooker tip in any shape or form!. At this stage it seems that all is lost but we’re not developing penicillin are we…….. or are we?

Removing the milk bonding agent
As I said, the tips are like a sponge and full of the milk so we need to remove it again by compression and if completed overnight again, the natural bonding agent in the milk will have a chance of holding the tip layers together and lessen the tip height. I am really curious at this point to see if the milk does it’s job and holds the compacted layers in shape.
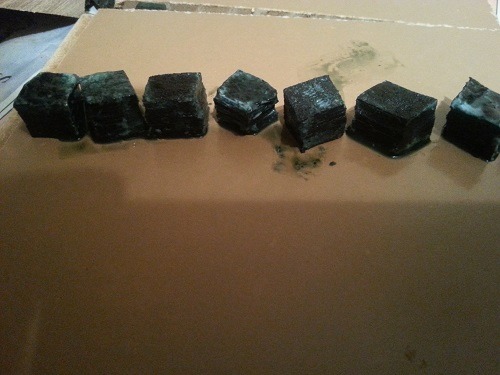
Compressed laminated layers
Well this had certainly changed shape overnight. The milk has all been compressed out by tightening the vice as much as possible and the laminated layers have held their new compressed shape quite well. I can bend them slightly but they are far tighter than they were. They do seem a little wet still so we’ll need to fix that.

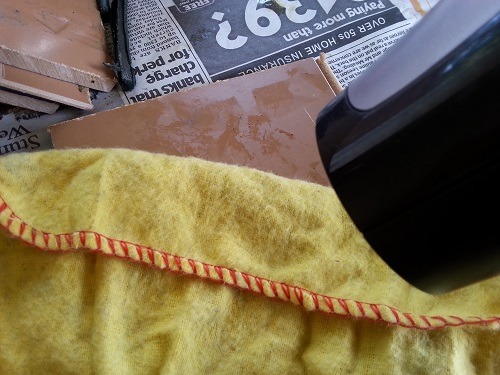
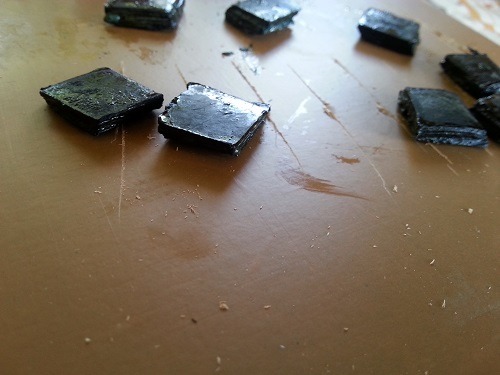
Drying the laminated snooker tips
Now I would say it’s probably best to leave the wet tips further so the bonding agent can take in normal time but i’m too anxious to get on for the sake of the experiment! To speed things up I’ve used a hair dryer but I’m sure leaving it over night would be best to hold the shape. Put them in a duster to dry (or similar) or similar or guess what, they’ll blow away whilst drying!

Preparing to stick the snooker tip
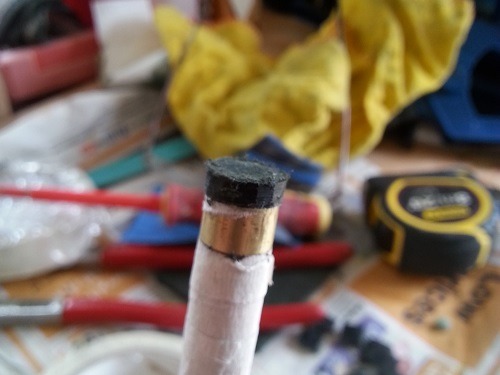
I was anxious to test the structure of the tip so sanded a bit off using 80 grit sandpaper, the tip was pretty soft using this grit. Normally with a new tip you rotate the base of it in a figure of eight so I proceeded to prepare the base with 200 grit until I was happy it was ready to fit. Now normally a lot of guys use super glue gel but we are going to use straight super glue on both surfaces.

Sticking the snooker tip to the ferrule
As we’re using straight super glue, this will go off fast without the additional time convenience you get with the super glue gel. Apply it to both surfaces to ensure you haven’t missed anything and then hold the snooker tip to the ferule tightly for at least a minute. If you struggle with this then place a beer mat on the floor, invert the cue and apply reasonable pressure downward.

Starting to shape the snooker tip
To start the process of shaping the laminated layers, I invert the snooker cue and place it on one of those pieces of laminated floor we cut up. Use a Stanley or sharp hobby knife to remove the rough edges. Once you can remove all those rough edges we will be ready to try and shape the layers to resemble something that looks like a snooker tip!

Shaping the snooker tip to the ferrule
Now when i’m shaping any new tip I like to firstly shape it to the ferrule you are fitting it to so they end up with the same diameter. Now this seems obvious but there are many snooker tip shapes nowadays and some of the tips are actually shaped larger than the ferrule they are fitted on. I’m being careful here as we don’t know how strong the laminated layers are.
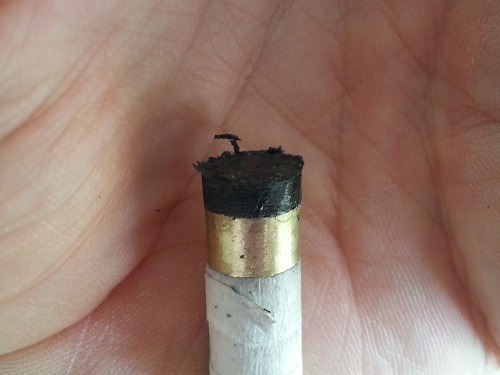
Layered snooker tip – First cut
Now this really looks in poor shape but you’ve got to remember I am taking it slow as we are working with an unknown quantity here, it could fall apart at any time. It’s virtually at the same diameter as the cue ferrule but not quite. The job now is to ensure we have a really sharp blade as we take small amounts off and make it as round as possible.
Layered snooker tip – Second cut
Well after a little slicing of the edges the tip is starting to take a better shape. At this stage it’s still very tall as regards a snooker tip (in my opinion) so we’ll have to do something about that in a while. For now, I’m quite happy that the tip is very close to the right diameter and hasn’t fallen apart. The tip at this stage is actually quite soft so steady as she goes.

Layered snooker tip – Rough sanding
Now we have the sides of the tip in a reasonable condition, it is time to shape the top and decrease the height of the tip. A medium grit sandpaper is now required to do this, I use around 200 grit but many will wince at this. I tend to move the cue round and take the layers off slowly whilst sanding until I am happy with the new snooker tip height.

Even sanding of the snooker tip
When i’m sanding the top of the tip I like to keep an eye on the rings so I keep them even as I go. One thing to keep an eye on is never leave a small circle in the centre as that’s a very small part of a layer and will probably come out after a few hits. It’s best to keep a large area in the centre that doesn’t contain any circles.
Final snooker tip shaping
I tend to use 600 grit paper when finishing the shaping of a snooker tip. This tends not to remove too much of the tip as you go and gives it a nice even finish if you take your time. I hate it when you use a course sandpaper and you end up with the tip getting cut up too much and then it’s difficult to hold the snooker chalk in place; starting to look a little like a snooker tip now?
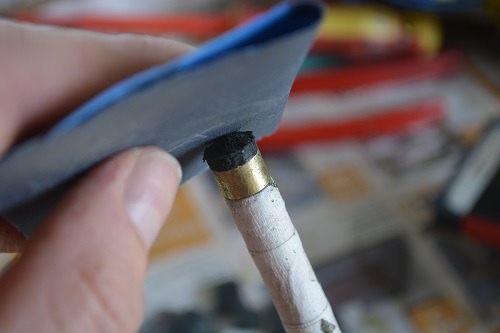
Finishing the side of the tip
When I want that perfect finish to the side of a snooker tip I generally tear a strip off some 600 grit paper. If you wrap it (as in the picture) and pull it with your right hand (or left if you do the opposite) so it rubs against the side of the tip and gives it that last rounded shaping against the ferrule. Keep checking it so you shape it evenly around the tip.
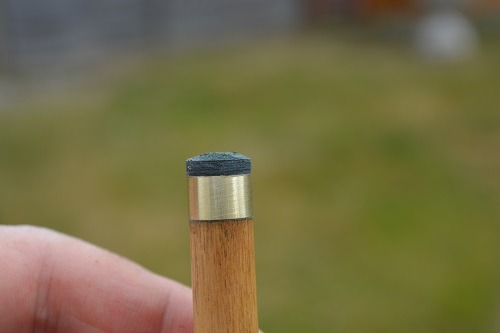
Is that a laminated snooker tip?
If you take your time with the fine sanding you should be able to get a good looking tip. Considering how we got here this isn’t looking too bad (I hope you agree?). The ferrule’s had a nice shine up and this is the height I like to play with a tip so I’m a little biased. If nothing else, at least this crude method has produced a decent looking snooker tip.

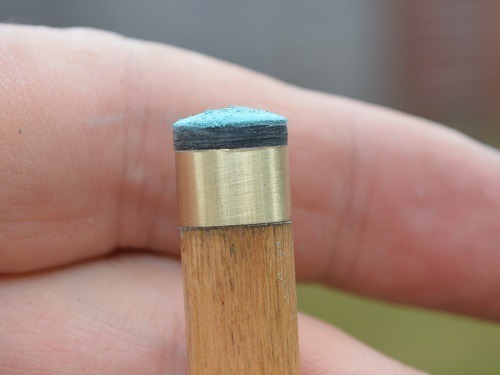
Can you see the layers?
If I place the tip against my hand you can start to see the original layers that I stuck together a little further back in the process. You may want a different shape to your tip but this is just an example and a simple experiment to see if we can reproduce something that even looks like a laminated snooker tip. Whether it plays like one we’ll have to see…
The finished snooker tip
Well I’ve got to say I’m quite pleased how the tip turned out visually, it looks like a nice shape and the chalk has stayed on at this point. Taking it to the table and playing a few shots will be interesting. Putting my finger nail into the tip it feels pretty soft so aesthetically it’s fine but whether it will grip and I can screw a ball the length of the table maybe a bit of a push at this stage!
Well that was a nice little experiment. Although I have shown you a lot of pictures, the snooker tip didn’t take too long to produce at this stage. To get a consistent tip you would have to firm up the stages that’s for sure and I would take a look more at the quality of leather obtained and possibly sealing the edges to help keep the tip intact as you remove the layers.
I hope you enjoyed a little look and may have a go yourself, feel free to give this article a little Facebook like if you have time.
[efb_likebox fanpage_url=”handmadesnookercues” box_width=”250″ box_height=”” locale=”en_GB” responsive=”1″ show_faces=”1″ show_stream=”0″ hide_cover=”0″ small_header=”0″ hide_cta=”0″ ]
Featured Products


All Snooker Cues


All Snooker Cues


All Snooker Cues


All Snooker Cues


All Snooker Cues

All Snooker Cues
1 Piece Cue Cases


1 Piece Cue Cases
Snooker and Cue Sports Blog

What type of glasses should I look for when playing snooker
What type of glasses should I look for when playing snooker? Over the years I [...]
Oct
Eye Opening Tips & Ferrules
Well I hope this has given you some thoughts around your own tip shape and [...]
Oct

How to cut and shape a trumpet – crown cue tip
How to cut and shape a trumpet – crown cue tip If you are after [...]
Apr

Cuestars Academy Snooker App
For those that don’t know, John Hunter is a World Snooker Qualified Coach with over [...]
Feb

Taylor Made Snooker Cues
When striking the cue ball you need to be confidence that the shaft is rigid [...]
Feb

What do I need to think about when buying a cue?
Well, I hoped you enjoyed this little insight into cue buying. It’s better to be [...]
Feb